Murals using glow paint or stickers let you create interactive, long-lasting displays that light up on command; your mural can glow for hours and durable paint adheres to treated surfaces across climates. You can redraw designs with a UV or blue laser pointer—protect your eyes, as lasers are hazardous. Stickers offer quick cut-and-paste application while paint yields seamless coverage; prep the surface, test colors, and position black lights for continuous effects.
Understanding Glow in the Dark Materials
You’ll work with two main options—paint and stickers—both using phosphorescent pigments that store and re-emit light; modern strontium aluminate-based products commonly charge in 10–30 minutes under bright light and can glow visibly for 6–12+ hours depending on pigment, layer thickness, and charging source, so pick materials based on surface, maintenance, and interactivity needs.
What is Glow in the Dark Paint?
You apply glow paint by brushing or spraying phosphorescent pigment suspended in a carrier; for consistent output you should use 2–3 thin coats, prime porous substrates, and seal for outdoor or high-traffic murals. Strontium aluminate formulations deliver higher brightness and longer duration than older zinc sulfide variants, and solvent-based mixes may require ventilation and PPE.
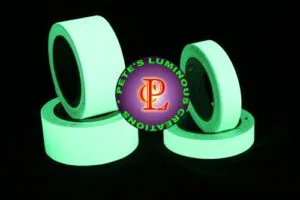
What are Glow in the Dark Stickers?
You get pre-made vinyl or PVC sheets with phosphorescent layers that you cut and apply, giving crisp shapes with minimal mess; stickers are ideal when speed and clean application matter, but adhesive type and UV stability determine whether they’re suited for indoor or outdoor use.
You’ll typically see indoor sticker installations last beyond 5 years, while outdoor exposures often range 1–5 years depending on sunlight and weather; you can combine stickers with paint—use stickers for precise motifs and paint for blended backgrounds—and always test a sample, since heat, moisture, and textured walls reduce adhesion.
Differences Between Paint and Stickers
You’ll find paint conforms to textured or curved surfaces and delivers seamless large-area coverage with better longevity when sealed, whereas stickers provide fast installation, removable options, and razor-sharp edges for detailed elements; paints tend to be cheaper per square foot on big murals, while stickers cut labor and skill requirements for intricate shapes.
If you compare costs on a 10 m² wall, you’ll often save money using two coats of glow paint plus primer and sealer, but stickers let you swap designs seasonally without repainting; also note that paint may require ventilation and PPE for some formulations, and stickers carry adhesion and UV-fade risks you should evaluate before installation.
Benefits of Glow Wall Murals
You gain multiple advantages when you use glow paint or stickers: interactive play that responds to UV/blue laser pointers, durability on treated surfaces for indoor and outdoor use, and visual impact that can last up to 8–12 hours after a bright charge depending on the product. You can swap designs quickly with lasers or replace sticker sections in minutes, and the low-maintenance nature makes glow murals a high-impact, low-effort upgrade for homes, venues, and commercial spaces.
Fun and Entertainment Value
You turn walls into active entertainment hubs for kids’ parties, escape rooms, or gaming dens; guests trace constellations, create UV light trails, or play tag with glowing markers. You’ll find that using UV or blue laser pointers produces the sharpest trails and fastest redraws, and the interactivity often increases engagement time by the hour. Avoid pointing lasers at eyes to keep play safe and enjoyable.
Aesthetic Enhancements for Spaces
You can create subtle accents or bold focal walls by layering 2–3 glow paint colors or cutting geometric shapes from sticker sheets for crisp lines. You’ll achieve continuous, neon-like effects under black lights, and the materials adhere well to primer-treated drywall, metal, and sealed wood—making them suitable for lounges, kids’ rooms, and gallery installations. Durability on treated surfaces preserves visual quality through repeated cleanings and climate changes.
You can elevate branding and ambience with case-based approaches: in cafés or boutique retail, combine glow accents with ambient LED lighting to guide customers to focal products; in residential bedrooms, map a glow starfield to match constellations. You’ll also find sticker sheets ideal when time is limited—cut-and-paste installations commonly take 15–45 minutes for a 2×2 m panel—while paint lets you blend gradients and textures for bespoke effects.
Creating an Engaging Atmosphere for Events
You enhance live experiences at concerts, corporate activations, or weddings by integrating glow murals as interactive backdrops or signage that guests can modify with UV pens or pointers. You’ll get immediate crowd response when murals react in real time, and the option to run black lights yields continuous glow for the duration of the event. Do not aim lasers at performers or the audience to avoid eye hazards.
You can scale installations from a 3×3 m festival wall to a 1×1 m photobooth backdrop: use sticker sheets for fast turnaround and paint for large, blended murals. You’ll want to prime surfaces for paint, allow 1–2 hours between coats and a 24–72 hour cure for full durability, while sticker setups typically require minimal tools and no drying time—making them the go-to when you need a high-impact result on tight timelines. Coordinate laser use with event lighting techs to maximize effect and safety.
Planning Your Glowing Wall Mural Design
Measure your wall, note obstacles like outlets and vents, and divide the surface into a simple grid (for example, 2‑ft or 60 cm squares) so you can scale sketches accurately. Factor in light sources: place black lights or UV lasers where they’ll charge the paint evenly. Test a 6″x6″ patch for adhesion and glow time, and mark areas where stickers work better than paint. Avoid direct eye exposure to UV and laser light when planning placement.
Choosing a Theme
Pick a theme that fits the room’s purpose and viewing distance—constellations and star maps work well on ceilings, while bioluminescent reefs or neon cityscapes read better on feature walls. Use specific references: map the Big Dipper or the Orion constellation for a 10–12 ft ceiling, or base a mural on a photographed coral reef for realistic color blends. Match theme scale to viewer distance to keep details legible and engaging.
Sketching Your Ideas
Start with three thumbnail sketches to explore composition, then create a 1:10 or 1:20 scale drawing to plan placements for paint and sticker elements. Indicate where you’ll use high-glow pigments versus subtle accents, and sketch intended UV/laser trails so motion interaction feels intentional. Use a projector or grid transfer to maintain proportions. Test alignment with a taped grid before final work.
Develop a workflow: trace your favorite thumbnail onto kraft paper at full scale, mark the grid, and note layer order—background base coat, midtones, and final glow highlights. For stickers, mock up cut lines and plan seams to avoid visible gaps; for paint, specify brush sizes and stencil shapes. Allocate time: allow 30–60 minutes per 4 sq ft for paint application and 24 hours for full curing before heavy handling. Keep a test panel to compare glow intensity after 10 and 60 minutes of charge.
Color Selection and Design Composition
Choose colors based on glow longevity and visibility: green and blue pigments usually yield the brightest, longest-lasting glow, while red/violet offer dramatic but shorter effects. Balance a dominant glow color with 1–2 accent hues and use dark matte backgrounds to increase perceived contrast. Plan for how a UV or blue laser will interact—some pigments fluoresce more intensely under blue than under white light.
Refine composition by testing small swatches: apply three colors side-by-side, charge them for 5–10 minutes with your intended light source, and observe for 30–60 minutes to assess decay rates. Use a white primer under translucent glow paints to boost vibrancy by up to 20–30% visually, and reserve sticker sheets for crisp edges or repeating motifs. Always test combinations under both black light and normal darkness before committing to the full mural.
Products Required
Types of Glow in the Dark Paint
You’ll pick from acrylic, water-based, oil-based and concentrated phosphorescent additives offering roughly 4–12 hours of emission when charged by sunlight or a UV/black light. Apply 1–3 thin coats for even luminosity, sand gloss surfaces with 120–220 grit, and work in a ventilated area; use a respirator if spraying. Thou always run a small adhesion and glow test on your wall before doing the full mural.
- glow paint: acrylic, oil, water-based options
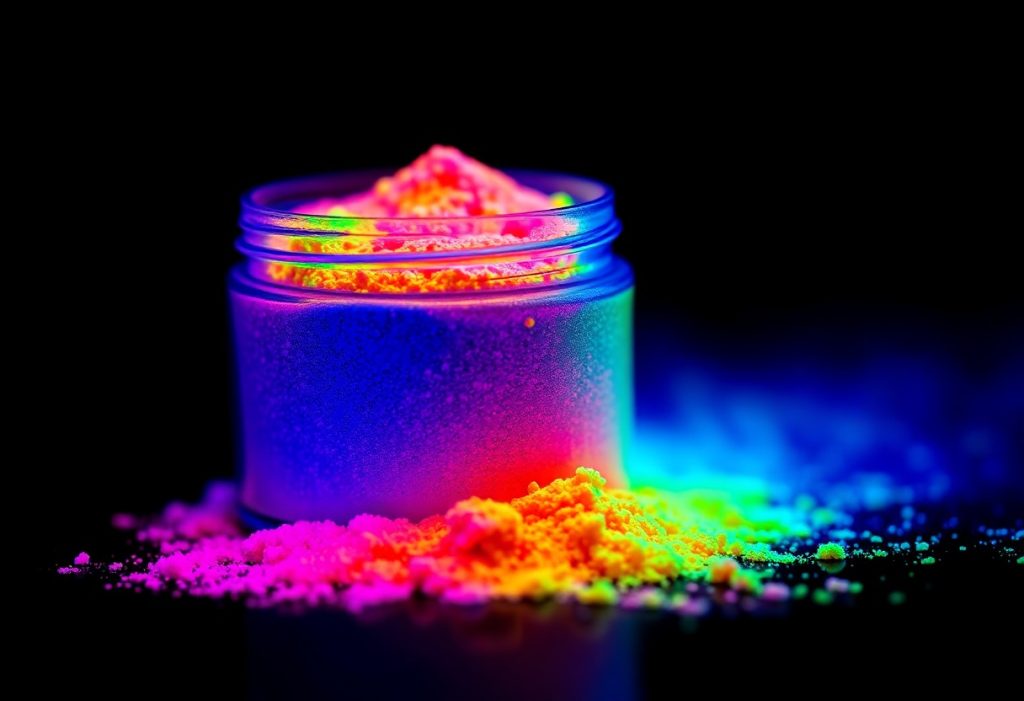
- phosphorescent: powder concentrates to mix in
- UV/black light: used to charge and enhance glow
| Acrylic | Fast-dry, indoor, 6–10 hr glow |
| Water-based | Low odor, easy cleanup, good for bedrooms |
| Oil-based | Durable, outdoor use, longer cure |
| Phosphor powder | Mix 10–30% by weight for intensity |
|
Glow primer | Improves adhesion on treated surfaces |
Types of Glow in the Dark Sticker Sheets
You can choose vinyl or PET-backed glow stickers in matte or glossy finishes with removable or permanent adhesive, typically 3–6 mil thick and rated for months outdoors if laminated. Cut precision with a plotter or craft knife, apply at 15–30°C, and squeegee from center outward to remove air. After smoothing, allow the adhesive to set per manufacturer’s cure time before heavy use.
- glow stickers: vinyl/PET options
- adhesive: removable vs permanent
- UV laminate: protects color and glow outdoors
| Printable vinyl | Best for custom shapes, plots easily |
| Pre-cut decals | Fast application, ideal for beginners |
| Reflective PET | Durable, resists moisture |
| Removable adhesive | Temporary murals, low-residue |
| Permanant adhesive | Long-term installs, higher bond |
Thicker sticker sheets (4–6 mil) hold shape on textured walls, while thin 2–3 mil films conform better to slight unevenness; use a heat gun at low settings for complex curves and a squeegee to avoid bubbles. You should weed fine details with precision tweezers and test a patch for UV recharge and colour shift under a black light. After 24–48 hours the adhesive approaches full bond—avoid heavy abrasion until cured.
- vinyl: best balance of durability and flexibility
- PET: higher tear resistance for outdoor murals
- UV laminate: extends outdoor life by blocking UV
| Thickness | 2–6 mil: conform vs rigid |
| Adhesive type | Removable vs permanent |
| Finish | Matte vs gloss affects glare |
| Cut method | Plotter for detail, knife for small runs |
| Protective laminate | Improves UV and abrasion resistance |
Tools for Application
You should stock 0–6 round detail brushes, 3/8″ nap roller for smooth walls, a 0.3–0.5mm airbrush or HVLP sprayer, craft knife and cutting mat for stickers, plus a 365 nm UV torch to test glow intensity; wear nitrile gloves and a respirator when mixing powders or spraying. Keep a squeegee and heat gun handy for sticker installs.
For spraying, set compressors to 15–25 psi and use .5–1.0 mm nozzles for bodywork; expect to use roughly 500–800 ml of mixed glow paint per 2 m² per coat on average—plan 2 coats. Sand glossy primers with 120–220 grit, clean with a tack cloth, and use masking film for crisp edges. Have a spare UV torch and test strips to compare pigments; do not point lasers at eyes and follow safety data sheets for powders and solvents.
Preparing the Space
Clear the area and protect floors and furniture with drop cloths; you’ll want dust-free conditions for strong adhesion and even glow. Leave windows closed or control humidity between 30–60% and temperature between 10–30°C (50–86°F) for optimal drying. Keep a fan or ventilation running when using solvents, and stage tools—ladder, foam rollers, measuring tape, laser level—within reach to avoid interruptions while the primer or paint cures.
Selecting the Right Wall
Pick a smooth, treated surface such as primed drywall, plaster, or sealed wood; these hold glow paint and stickers best. Avoid heavy textures like popcorn ceilings or rough stucco—surface irregularities over ~2 mm scatter light and reduce laser-detail. For interactive murals, choose a wall at least 1.5 × 1.5 m, with controllable lighting and minimal foot traffic to prevent accidental scuffs that dull the glow.
Cleaning and Priming the Surface
Start by vacuuming and wiping with a microfiber cloth, then clean with 70% isopropyl or a TSP solution to remove grease and silicone. Sand glossy areas with 120–220 grit, fill holes with spackle, and tack off dust. Use an acrylic bonding primer (e.g., Zinsser Bulls Eye 1-2-3 or equivalent) to create a uniform base; most primers recoat in 2–4 hours and significantly improve paint/sticker longevity.
Work in steps: patch and sand, then wipe with a tack cloth. Apply primer with a foam roller for a smooth finish; one thin coat is usually sufficient on drywall, while porous masonry may need two. Allow recommended dry time—typically 30–60 minutes to touch, 2 hours before recoating—and avoid painting when humidity exceeds 60% or temperatures are outside the 10–30°C range. Wear a respirator and ensure ventilation when using solvent-based primers.
Measuring and Marking
Find the wall center and mark horizontal and vertical reference lines using a laser level or chalk line. Break the design into a grid—common spacing is 30–50 cm squares—so you can transfer a scaled sketch precisely. Use a soft pencil or low-tack painter’s tape for temporary marks, and note obstacles (outlets, switches) by measuring their centers and leaving a 2–3 cm clearance for paint or sticker edges.
Create a simple scale drawing: if your wall is 240 cm wide and the design is 120 cm, a 1:12 scale or 10×10 grid simplifies transfer. Snap chalk lines every 30–50 cm, then mark key points at multiple heights (every 50–100 cm) to maintain alignment. When working near electrical fixtures, turn off power before marking or applying paint to avoid hazards and ensure safe access.
Applying Glow in the Dark Paint
Work in stages: apply a white primer first to maximize luminance, then build the glow layer with 2–4 even, thin coats, sanding lightly between coats for adhesion; allow 15–30 minutes flash-dry between water-based coats and 24–48 hours for full cure. Charge the mural under bright LED or sunlight for 10–30 minutes to get 2–8 hours of visible glow depending on pigment grade and coat thickness.
Preparation of the Paint
Shake or stir the jar for 60–120 seconds to homogenize phosphorescent pigment; if using acrylic water-based paint, thin up to 5–10% water for spray or airbrush, while solvent-based formulas need the manufacturer’s thinner. Test a small sample on your substrate, and always prime with white for maximum output; wear gloves and keep the workspace ventilated.
Techniques for Applying Paint
Use a foam roller or short-nap roller for broad, smooth coverage and synthetic brushes for edges; airbrushing gives the finest control—set nozzle to 0.3–0.5 mm and 20–30 psi for varnish-like flow. Masking with painter’s tape yields sharp lines, and layering multiple thin coats produces a brighter, longer-lasting glow than one thick coat.
For a typical mural, apply two coats of white primer, then three coats of glow paint—let each coat dry 15–30 minutes at 20°C (68°F). When airbrushing, thin the paint ~10% and keep passes light to avoid sagging; for outdoor murals add a UV-resistant clear topcoat (acrylic or polyurethane) after 48 hours to protect against weather and abrasion.
Safety Precautions
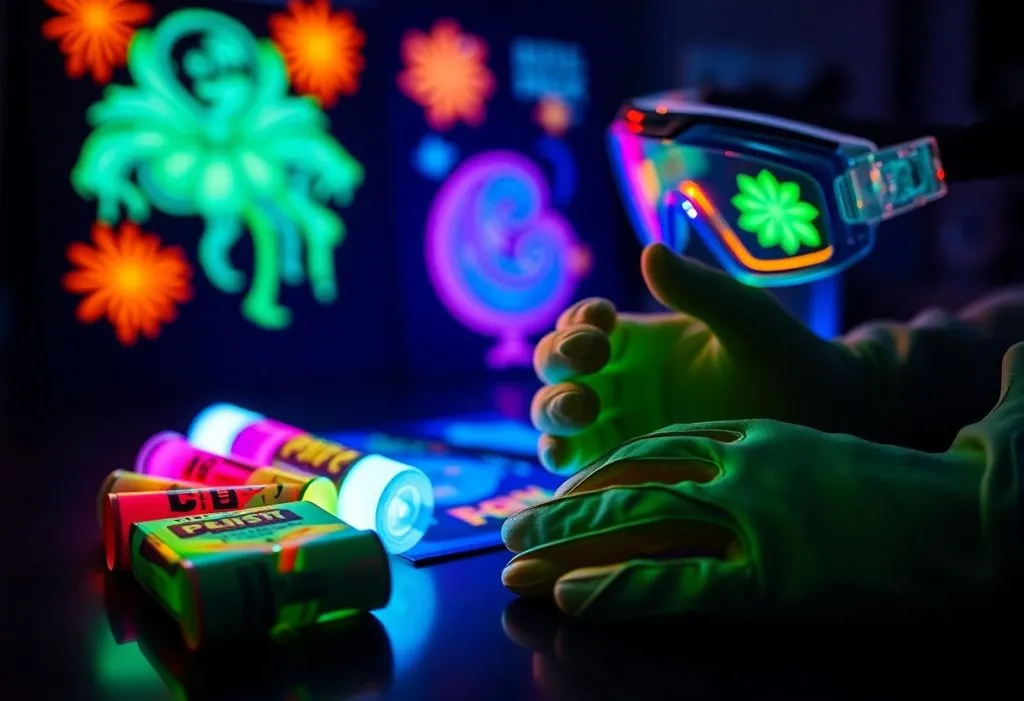
Work in a well-ventilated area and use PPE: gloves, eye protection, and a mask. If spraying, use a respirator rated for particulates and solvents; check the paint’s MSDS for specific hazards. Avoid skin contact, and note that some solvent-based glow paints are flammable—store them away from heat and open flames.
When using UV or blue laser pointers on your mural, do not shine the beam at people or reflective surfaces; wear laser-rated safety goggles for the pointer wavelength. If paint contacts your skin, wash within 15 minutes; for prolonged spraying, ensure exhaust or cross-ventilation and follow local disposal rules for solvent-containing materials.
Using Glow in the Dark Stickers
You can create quick, high-impact murals by cutting and pasting glow-in-the-dark stickers onto smooth, treated walls; they charge under ambient light and glow for hours, with the best effects under a black light or when traced by a UV or blue laser. Apply stickers to areas free of dust and oil for maximum adhesion, and combine colors or layers to build depth and interactivity without wet paint.
Preparing the Stickers
Clean your surface with isopropyl alcohol or mild detergent and let it dry fully; cut sheets into manageable pieces (15–30 cm / 6–12 in) and lay them out to plan placement. Peel a small corner of the backing to test adhesion, and have a squeegee or credit card ready to smooth bubbles; press firmly for 10–30 seconds to bond the edges.
Application Methods
For large murals, work in panels: start at the top-left and apply 15–30 cm (6–12 in) strips, overlapping by 1–2 mm to hide seams. Use a roller or squeegee to expel air, and employ a low-heat hairdryer to soften the adhesive for tighter curves. You can also cut decals for detail or create mosaics from many small pieces for texture.
Wet application works well for repositionable adhesive: mist the wall lightly with a 1:100 soap-and-water mix, place the sticker, then slide into final position and squeegee moisture out toward edges for 30–60 seconds; allow 24 hours to set before heavy contact. Keep UV or blue laser use away from eyes and reflective surfaces to avoid injury.
Tips for Removing and Repositioning Stickers
Peel slowly at a shallow angle (about 45°) to reduce tearing and adhesive transfer; warm the sticker with a low heat setting hairdryer for 15–30 seconds to loosen strong glue, then lift an edge and pull steadily. Use a plastic scraper for stubborn corners and clean residue with isopropyl alcohol. Assume that you test removal on a hidden spot first.
- peel slowly
- low heat
- isopropyl alcohol
- plastic scraper
When repositioning, work in small sections and avoid stretching the sticker; if adhesive remains on the wall, apply a citrus-based remover or 70% isopropyl alcohol with a microfiber cloth, rubbing gently until the residue lifts. For delicate finishes, protect paint by wetting and waiting 30–60 seconds before working the adhesive loose. Assume that you always test solvents on an inconspicuous area before full use.
- citrus-based remover
- 70% isopropyl alcohol
- microfiber cloth
- test first
Creating Designs in Different Colors
You can mix glow paint colors or layer sticker sheets to achieve vivid palettes; green and cyan pigments usually produce the brightest, longest afterglow, while red and purple charge faster but fade sooner. Apply 2–3 thin coats of paint with 10–15 minutes between coats, or arrange sticker mosaics in gradients, then test with a UV or blue laser pointer—different wavelengths will make each color respond uniquely, so try small swatches before committing to large areas.
Layering Techniques for Depth
Start with a light or white primer to boost luminance, then build depth with translucent glazes and negative-space layers; use 2–4 translucent layers spaced by light sanding to create soft halos and sharper foregrounds. For three-dimensional effect, paint a darker matte underlayer, add mid-tone glow, and finish with a thin top glaze of a contrasting color—masking tape and a soft roller help keep edges crisp while preserving glow intensity.
Combining Stickers with Paint
Use stickers for precise shapes and paint for gradients and texture: apply paint base, let it fully cure, then add pre-cut sticker elements for sharp silhouettes. Stickers make complex patterns easy, while surrounding painted glows soften transitions; press firmly with a roller to avoid bubbles and align colors so the sticker’s glow complements, not clashes, with adjacent painted areas.
For best adhesion and longevity, apply stickers only after paint has cured (typically 24–48 hours depending on formula), and protect seams with a clear, water-based topcoat that transmits UV light. Avoid solvent-based sealers that can yellow or block phosphors; always test a small area to confirm the sealer preserves both sticker adhesive and paint glow before finishing the whole mural.
Effects of Different Lighting
Black lights (UV-A, ~365–400 nm) produce continuous fluorescence while on, making murals glow vividly in real time, whereas brief charging with sunlight or a strong blue/UV laser pointer creates lasting afterglow. Blue lasers accent trails and fine details—best with consumer lasers under 5 mW—and ambient room light levels will determine how quickly the glow becomes visible once lights go off.
Wavelength matters: 365 nm UV excites many phosphors more efficiently than 395 nm, so pigments respond differently to each source; for outdoor murals, full sun gives the deepest charge (15–30 minutes for maximal afterglow), while a 2–5 minute exposure to a good black light or LED UV strip often suffices indoors—conduct timed tests to match your chosen pigments and desired runtime.
Glow in the Dark Paint vs. Glow in the Dark Stickers for Wall Murals
When you choose between glow paint and glow stickers, weigh interactivity versus convenience: paint gives the deepest, long-lasting recharge and works best for UV/laser drawing and full-wall effects, while stickers let you cut, layer, and remove designs quickly with minimal prep. For large, high-traffic or outdoor murals you’ll likely prefer paint; for renters, staged events, or precise shapes you’ll favor sticker sheets and vinyl decals.
Durability and Longevity
High-quality strontium aluminate glow paints typically maintain visible afterglow for years under normal indoor use and can perform well outdoors for roughly 5–10 years depending on UV exposure and surface prep; stickers—usually vinyl with photoluminescent film—tend to last 3–7 years outdoors before adhesive or pigment fade. You should seal painted murals with a UV-stable clearcoat to extend life and reduce abrasion.
Application Ease and Flexibility
Stickers win for speed—cut, peel, stick, and you’re done—while paint demands surface prep, primers, and multiple coats but rewards you with gradients, hand-drawn details, and dynamic laser trails; stickers are ideal for temporary installs or intricate cut shapes, paint is better when you want full-wall interactivity or large swaths of glow.
For paint application expect 2–3 thin coats for consistent glow: use a foam roller for broad coverage, an airbrush for fine detail, or an HVLP sprayer for speed, allowing 30–120 minutes between coats and 24–72 hours to cure fully. For stickers use transfer tape and a squeegee to avoid bubbles, test adhesion on a small area first, and consider edge sealing or a laminate overlay to prevent lifting in humid or exterior settings. In practice, a 10×10 ft painted mural often requires several work sessions and touch-ups, whereas an equivalent sticker layout can be installed by two people in a few hours.
Cost-Effectiveness
Upfront, stickers often cost less for small designs, but paint can be more economical per square foot on large murals: paint typically reduces long-term replacement costs for expansive or outdoor projects, while stickers minimize labor time and waste for short-term or precise installs. Factor in primers, clearcoats, cutting tools, and labor when comparing totals.
As an example, a mid-range 250–300 ml glow paint kit can cover roughly 20–40 sq ft at two coats (prices ~ $50–$150 depending on pigment grade), whereas 12×24″ glow vinyl sheets covering ~2 sq ft each cost roughly $10–$30 per sheet; for a 100 sq ft mural paint often ends up cheaper after accounting for longevity and fewer replacements, but stickers can be far cheaper if you only need a few decorative elements or frequent design changes. Also include the cost of black lights or UV chargers if you plan continuous recharging.
Enhancing the Mural with Lighting
Types of Lighting to Use
Choose lights that match your mural’s finish: black lights (UV-A 365–395 nm) produce long-lasting fluorescence on most glow paints, blue lasers (405–450 nm) let you draw bright, temporary trails, and LED strips offer dimmable, color-shifting washes for ambiance. For outdoor or humid spaces pick IP65 weatherproof LEDs, and for detail work use focused spotlights under 1000 lumens to avoid bleaching pigments. Thou: make sure you wear eye protection and keep beams away from faces.
- Black light (UV) — continuous fluorescence, great for full-wall coverage
- Blue laser — precise, temporal trails and drawing effects
- LED strips — ambient washes, RGB color control, dimmable
- Spotlights — highlight focal motifs and texture
| Black light (UV) | Best for uniform glow; use 365–395 nm tubes for vivid fluorescence and low heat. |
| Blue/Violet laser | 405–450 nm pointers (5–20 mW) create visible trails; dangerous to eyes—use responsibly. |
| LED strips | IP65-rated options for outdoors, space every 0.6–0.9 m for even wash; use dimmers for balance. |
| Spotlights | 45°–60° placement accentuates texture; pick low-heat LEDs to avoid paint degradation. |
| Blacklight tubes / panels | Fluorescent tubes or LED panels provide continuous glow for hours after activation; mount 2–3 m high for coverage. |
Placement of Lights for Maximum Impact
Angle grazing lights at about 30–60° to emphasize brush strokes and texture, mount blacklight fixtures ~2–3 m high for even fluorescence, and space LED washes every 0.6–0.9 m to avoid hot spots; use focused spots at 45° for focal elements and backlight cutout stickers for halo effects. Test at night with the room dimmed to balance glow intensity and ambient light. Thou: always secure fixtures and conceal cables to prevent tripping hazards.
For large murals in a 3×4 m area, combine two overhead blacklight panels with four dimmable LED strips along the top and bottom edges, and add two 300–500 lm spotlights for feature pieces; this layered approach gives you continuous fluorescence plus controllable highlights. Use diffusers to soften LED edges, choose flicker-free drivers for video capture, and mark all fixture positions on a test grid before permanent installation.
Using a Blue Laser Pointer for Design Highlighting
Employ a low-power 405–450 nm blue/violet laser (commonly 5–20 mW) to trace lines and create temporary UV-activated trails on glow paint; sweep slowly for thick, persistent strokes and faster for fine, ephemeral marks, pairing the pointer with a darkened room or blacklight for maximum contrast. Avoid reflective angles and mirrors that can redirect the beam. Thou: never aim the laser at eyes or reflective surfaces and follow laser-class safety guidelines.
For controlled effects, mount the pointer on a simple slider or pan arm to produce repeatable patterns, or use a handheld with steady, slow motion for organic strokes; on green or yellow pigments trails can last 3–10 seconds, while some pigments flash brighter but decay faster. Opt for class 2/3R pointers under 20 mW for public spaces, add eye-safe signage, and trial different speeds and distances to tune brightness and persistence.
Maintenance and Care of Glow Murals
Maintain your mural by dusting weekly and performing gentle deep cleans monthly for high-traffic areas or every 3–6 months otherwise. For outdoors, plan a protective clear coat inspection and recoat cycle of every 1–2 years depending on sun exposure; constant UV can dull binders over time. Keep spare paint or sticker panels and a small sample swatch so you can match colors and glow intensity when doing touch-ups or replacements.
Cleaning Techniques
Dust with a microfiber cloth or soft brush to avoid micro-scratches, and wash with a pH-neutral soap and lukewarm water for stains. For sticker murals, lift edges gently and clean beneath adhesive with soapy water; avoid razor blades. Do not use abrasive pads, acetone, or strong solvents—these will strip glow pigments and binders. For mold on outdoor murals, test a 1:10 bleach solution on a small area first and rinse thoroughly.
Repairs and Touch Ups
When paint chips or stickers peel, match the original product code or color sample before repairing. Remove loose material with a plastic scraper, feather edges, then apply thin coats of glow paint—typically 1–2 coats—allowing 1–2 hours between layers and full cure in 24–72 hours. For stickers, replace whole panels for a seamless finish. Always test a small patch to confirm glow match before completing large repairs.
For finer repairs, wet-sand edges with 400–600 grit between coats to blend repairs invisibly, and use a fine artist brush or micro-spray for even application. If durability is needed, add a UV-stable clear spray topcoat after full cure; note that some solvent-based clear coats can slightly reduce perceived glow, so choose water-based, UV-transmissive finishes. After touch-up, charge the area under bright light to verify visual match.
Ensuring Continued Glow Effectiveness
Boost and maintain glow by charging the mural regularly: 10–30 minutes in direct sunlight or 30–60 minutes under a strong black light typically produces a visible, long-lasting charge. Use black lights or blue laser pointers for interactive effects, and avoid varnishes that block UV if you rely on black-light charging. Monitor performance seasonally and note any color shifts to plan touch-ups.
Expect outdoor brightness to decline faster; plan pigment reapplication every 2–4 years in high-UV climates. Store leftover paint sealed at 15–25°C and keep replacement sticker sheets flat and out of sunlight to preserve adhesive and luminescent properties. Keep a small charged swatch as a reference so you can compare glow intensity when evaluating if a recoat or replacement is needed.
Ideas for Events and Parties
Themed Parties Featuring Glow Murals
Turn your mural into the main attraction for a space, rave, or Halloween theme: paint a 10×10 ft galaxy with glow paint and add constellation stickers, or use neon sticker sheets for an 80s dance wall. You can set 2–4 black lights across the room and schedule a 15–30 minute “glow reveal.” Guests engage faster when you give each group a color—mixing blue and green yields teal effects you can change with a UV laser.
Interactive Elements to Incorporate
Let guests draw temporary designs with a 405 nm UV/blue laser or trace stencils on a charged surface; place glow bracelets and handheld blacklight wands so people can add accents. Include cut-and-paste glow stickers for quick customization, and mount an area with matte sealer for repeated redraws—this keeps the mural durable and fun for groups of 10–50 attendees.
For deeper interactivity, set up stations: one with a 2–3 minute charging lamp (UV flashlight or 10–15 minute sunlight exposure) so guests can experiment with different glow paint colors, one with pre-cut glow sticker shapes, and one with a supervised UV laser demo using low-power 405 nm pens. Safety-wise, enforce no direct eye exposure to lasers and post an instruction card; position black lights 6–10 ft apart to get even coverage. Use a vinyl drop cloth and a labeled trash bin for quick cleanup to keep traffic moving.
Tips for Hosting a Glow-In-The-Dark Event
Test the mural 24–48 hours ahead: charge panels for 5–10 minutes under a UV flashlight or 30–60 minutes in daylight, then dim the room and inspect coverage; place black lights 6–10 ft apart, and limit high-powered lasers to trained hosts. Provide goggles for any staff handling lasers, supply extra glow stickers for guests, and mark exits with reflective tape. After your event, peel stickers within 72 hours to avoid adhesive residue.
- glow paint — charge 5–10 min under UV
- glow stickers — quick apply/remove
- black lights — space 6–10 ft for even glow
- UV laser — low-power, supervised use only
Plan flow so guests arrive in small groups (6–12 people) to avoid crowding the mural; assign a host to demo techniques and to operate any UV laser or black lights, and keep a labeled first-aid kit nearby for minor incidents. Bring spare batteries and a portable charger for lamps, post clear safety signs about laser eye risks, and set up a charging station where guests can top-up wristbands or props. After the party, schedule a 30–60 minute teardown with microfiber cloths and mild cleaner to preserve painted surfaces.
- glow paint — durable when sealed
- black lights — imperative for continuous glow
- glow stickers — fastest setup
- UV laser — powerful effects, supervise use
Troubleshooting Common Problems
If you hit common issues like weak glow, peeling stickers, or patchy paint, focus on surface prep, charging, and application technique. Test a 10×10 cm sample area first and make adjustments: more charge time, extra coats, or better adhesive. Many fixes are simple—cleaning with isopropyl alcohol, using a black light for charging, or applying a sealer—so you can restore performance without redoing the whole mural.
Paint Not Glowing as Expected
If your glow paint looks dim, check charging and coat thickness first: 3–5 minutes under a strong UV/black light gives immediate brightness, while 30–60 minutes in direct sunlight boosts longevity. You should apply 2–3 thin coats, allow 15–30 minutes between coats and 24 hours cure. Also verify you used a photoluminescent grade paint—cheaper craft paints often have much shorter glow times.
Stickers Peeling or Falling Off
Peeling usually means poor adhesion: surface oils, dust, high humidity (>80%), or very textured paint will reduce stickiness. Clean with isopropyl alcohol, apply at 10–27°C (50–80°F), press firmly with a squeegee, and avoid wet or silicone-treated walls. Test an inconspicuous area first to check bond strength before committing to large sheets.
For stubborn edges use a low-heat hairdryer to warm the sticker and conform it into texture, then roll edges with a seam roller. If adhesion still fails, apply a thin layer of repositionable spray adhesive (e.g., 3M Super 77) to the sticker backing—test first to ensure it won’t strip paint. For outdoor installs, choose stickers rated for exterior use and consider a clear acrylic edge seal to prevent lifting.
Uneven or Patchy Coverage
Patchiness often comes from applying one thick coat or not stirring pigment properly. Use 2–4 thin coats, keep a wet edge, and overlap strokes by ~50% with a high-density foam roller or airbrush for smoother laydown. Lightly sand between coats with 220 grit if the surface is rough, and avoid painting below 10°C to prevent poor flow.
To get uniform luminescence, measure coverage: many glow paints cover roughly 6–10 m² per litre per coat—adjust coat count if your coverage is low. Thin the paint up to 5–10% with water or manufacturer thinner for rollers; for spray systems follow the product’s viscosity guidelines. Consistent ambient temperature (18–25°C) and steady technique yield the most even glow.
Conclusion
On the whole you can create durable, interactive glow wall murals by choosing paint for broad, long-lasting coverage or stickers for quick, cut-and-paste designs; charge the surface with ambient light or a UV/blue laser pointer to draw temporary patterns, and use black lights for continuous vibrancy. Apply to treated surfaces, test color and laser combinations for best contrast, and clean gently to preserve your mural’s luminescence.
FAQ
Q: How should I prepare a wall before applying glow paint or glow-in-the-dark stickers?
A: Clean the surface of dust, grease and loose paint; wash with mild detergent, rinse and let fully dry. Fill holes and sand glossy areas to create a slightly rough, even surface for adhesion. For paint, apply a compatible primer if the wall is porous or highly absorbent; for stickers, make sure the surface is smooth and dry and avoid textured finishes. Mask edges and trim with painter’s tape for crisp lines. Test a small patch to confirm adhesion and color before committing to the full mural.
Q: When should I choose glow paint versus glow sticker sheets?
A: Choose glow paint for seamless large-area murals, fine blending, layered color effects, and greater long-term durability on treated surfaces. Paint lets you mix colors, airbrush, or use stencils for custom gradients. Choose sticker sheets for quick installation, renter-friendly temporary designs, precise cut shapes, and minimal surface prep—cut, peel, and apply. Stickers are easiest for portable or frequently changed displays; paint is best for permanent or large interactive murals.
Q: How do I charge and activate the glow effect for best interactive results?
A: Charge the mural using bright white light, direct sunlight, or a strong LED for several minutes to hours depending on intensity—the brighter the light, the faster and stronger the initial charge. Use a black light (UV-A) to make the mural glow continuously and boost fluorescence; a black light can keep it visibly bright for hours and increase contrast for laser drawing. For dynamic tracing, cover the glowing surface fully, then use a UV or blue laser pointer to “draw” over the charged area—lines will appear instantly and can be refreshed by recharging the surface.
Q: How can I create multi-color effects and use a laser pointer to draw on the mural?
A: Use different color glow paints or sticker sheets for layered color zones. Apply a light-reflective base (white or pale primer) to increase vibrancy, then let each layer dry before adding another. Mask areas with stencils for crisp boundaries. For laser drawing, charge the entire mural first, then run a UV or blue laser pointer across the painted or stickered surface—the beam re-excites the phosphors and produces bright, transient strokes. Different glow colors react differently to UV/blue light, so test combinations to predict how laser trails will appear.
Q: How durable are glow murals outdoors or in high-humidity areas, and how do I maintain or remove them?
A: Properly applied glow paint is designed to be stable on most treated surfaces and withstand a range of climates; add a clear protective topcoat (UV-stable sealer) for outdoor or high-traffic locations to extend life. Clean with a soft cloth and mild soap; avoid abrasive cleaners and solvents. Sticker sheets adhere well to smooth, treated surfaces but may lift over time outdoors—use outdoor-rated adhesive or seal edges. To remove stickers, heat gently and peel; use adhesive remover for residue. Paint removal requires sanding or repainting. Always test maintenance and removal methods on a small area first.


Leave a Reply
You must be logged in to post a comment.